In-Depth
How To Use VMware Instant Clone, Part 2: Deploying Desktops
Yes, creating new virtual desktops is extremely fast.
Click here for Part 1
In Part 1 of this tutorial, I showed how to set up and install VMware's breakthrough Instant Clone technology. Now I'll demonstrate how to deploy it, and give an overview of its strengths and weaknesses.
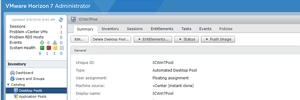
While the Instant Clone desktop pool was being created, I monitored the process via the vCenter admin portal. I noticed from the "VMs and Template" view that numerous folders were being created, and various VMs were being created; the Recent Tasks window (Figure 1) detailed this activity.
Once the provisioning of the Instant Clones was finished, I was able to successfully log in and out of the virtual desktops. I noticed that any files I left on my virtual desktop were missing after I logged off and back on to my VM. This was to be expected, as the old desktop was destroyed and a new desktop was created upon login. If data persistence is a necessity, however, you can use App Volumes and VMware User Environment Manager (UEM).
 [Click on image for larger view.]
Figure 1. Creating the Instant Clone desktop pools.
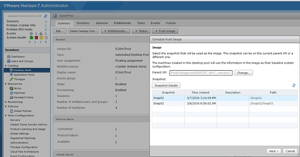
In order to update a pool, the master image needs to be updated; that image then must be pushed to the pool of desktops. To update the parent virtual desktop, it must be powered on, have the needed changes made, then have a snapshot taken. Once the new snapshot's been completed, the View Administrator portal can be used to select the new snapshot (see Figure 2) and push it to the desktops, as shown in Figure 3.
 [Click on image for larger view.]
Figure 2. Selecting a snapshot.
 [Click on image for larger view.]
Figure 3. Pushing the snapshot to the desktops.
You can update the image immediately, or wait for the user to log off before updating the virtual desktop.
It will take some time to prep a new image before pushing it out to the desktops. During this time, users can continue to use their existing desktops, and a new user can attach to desktops; but new users will get the old, pre-updated desktops until the new mater images are deployed. The vSphere Web Client will show the deletion of the old images and creation of the new desktops. In my case, it took about 10 minutes to prep the new image and push it out to the desktops.
Increasing Pool Size
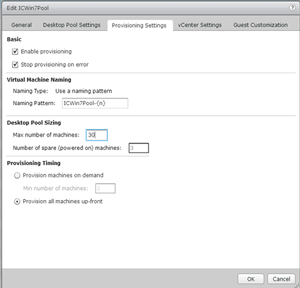
As one final test of Instant Clone technology, I wanted to see how long it would take to create 27 additional Instant Clones. To do this, I set the "Max number of machines" to 33 and selected "Provision all machines up-front" (
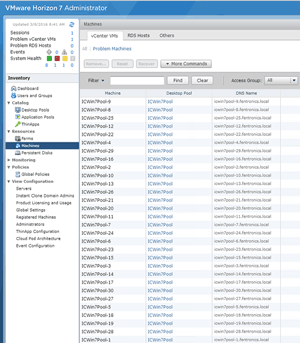
Figure 4). It took less than three minutes for the 27 desktops to be created (see
Figure 5).
 [Click on image for larger view.]
Figure 4. Creating additional Instant Clones.
 [Click on image for larger view.]
Figure 5. It took less than three minutes to create 27 additional Instant Clones.
Other Interesting Stuff
NOTE: In this next section I discuss the resources utilized in my home lab. These numbers are not indicative of what you will see in your lab or production environment, and should not be construed as any type of benchmarking or performance measurement. I took the numbers using a Dell PowerEdge R610 with dual Xeon X5660 CPUs with 82GB of RAM. I used Micron M500DC 2.5" 500GB SSD locally attached storage to store the virtual desktops. This server was running all the vSphere components as well as the Horizon 7 connection broker.
I noticed that when I created the 30 Instant Clone desktops, my CPU and memory utilization spiked; it settled down afterwards. The storage I/O remained fairly constant during the entire process. It should be noted, however, that none of the desktops were being utilized when I took these measurements.
CPU utilization spiked both when I updated the parent image to use the new snapshot and when I began the process of creating the 27 additional virtual desktops.
Surprises and Limitations
The biggest revelation I found with Instant Clones is how long it took to "prime" a parent image, and how quickly I could deploy desktops once I had a primed parent image. It took more than 10 minutes for my parent image to go through the priming process.
In hindsight, 10 minutes isn’t that long to wait, since I was able to create additional Instant Clone virtual desktops in fewer than 2 seconds afterwards. Assuming this rate of deployment, it would take less than 15 minutes (20 minutes + 100 x 2 seconds) to deploy 100 desktops, and fewer than five minutes to deploy an additional 100 desktops. That's quite impressive.
Another aspect of Instant Clones that caught me off guard was the lack of direct persistence on the desktops; users are given a new desktop to work with every time they log in. After some consideration, I believe it makes a lot of sense to do away with direct persistence on the desktop, because it removes a lot of the problems with OS updates and security issues. Applications and data persistence can be easily handled with App Volumes and UEM.
Looking over the documentation, I noted the following limitations when using Instant Clones:
- Floating desktops only; no support for dedicated desktops
- Support for only Windows 7 and Windows 10 virtual desktops
- RDSH is not supported
- Scales to 2,000 desktops
- Only a single vCenter can be used
- Only a single vLAN is supported
- VMware Hardware Version 11 or newer is required
- No NVDIA GRID; limited SVGA options
- Only VMware Virtual SAN or VMware vStorage VM File System datastores are supported for storage
- Data persistence and desktop personalization is provided by using VMware App Volumes, User-Writeable Drives, and VMware User Environment Manager (UEM)
Ready for Takeoff
With the introduction of Instant Clone in Horizon 7, VMware has released an innovative product. It was easy to set up and use, and greatly decreases the time necessary to provision a large number of desktops. I suspect in the near future that many people will start to work with Instant Clones and disposable desktops; in the long term, I believe there will be wide acceptance of these technologies.
A 60-day trial version of Horizon 7 can be accessed here. A link to the VMware 5 day Horizon 7 Install, Configure, Manage training class is here.
About the Author
Tom Fenton has a wealth of hands-on IT experience gained over the past 30 years in a variety of technologies, with the past 20 years focusing on virtualization and storage. He previously worked as a Technical Marketing Manager for ControlUp. He also previously worked at VMware in Staff and Senior level positions. He has also worked as a Senior Validation Engineer with The Taneja Group, where he headed the Validation Service Lab and was instrumental in starting up its vSphere Virtual Volumes practice. He's on X @vDoppler.